Think of survey branching as an old tree. AND not just because of the branching pun.
Just like a tree, survey branching starts with categorizing questions ( trunk) and then involves a series of questions ( branches) that lead to different answers, questions, or product results.
Understanding how to branch surveys will help you get the most accurate and customizable results from your users.
Survey branching is a technique used to customize a survey experience for different respondents based on their situation, needs, and goals.
This allows the survey to ask more relevant questions and provide a better overall experience for the respondent.
Survey branching eliminates irrelevant questions and topics. This helps the user find relevant information and not waste time on unnecessary information.
Thanks to survey branching, you can collect more granular data by asking different questions depending on the respondent’s characteristics or prior answers.
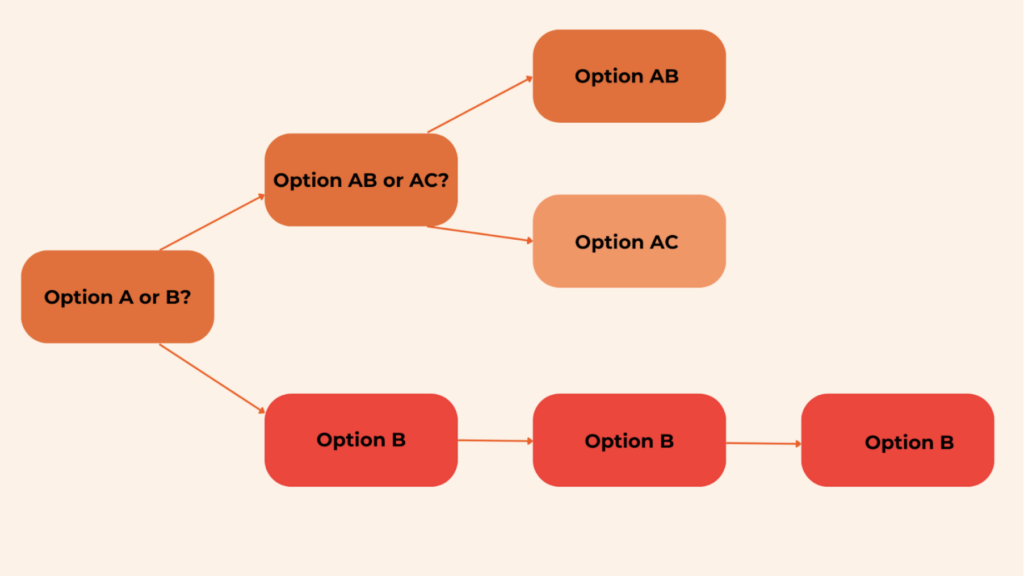
Here’s a little graph to help you get a better idea of what survey branching could look like:

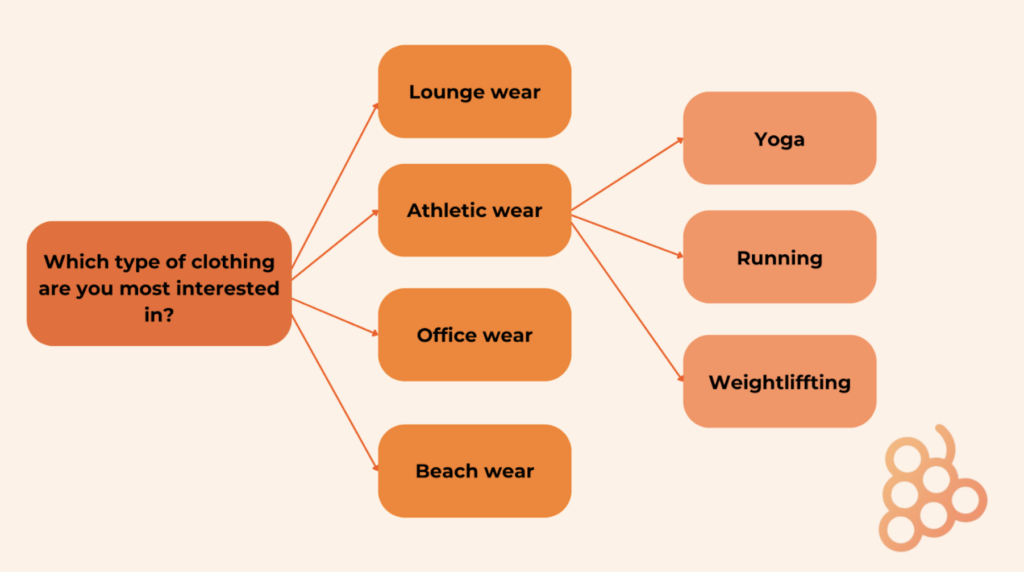
Let’s consider a clothing brand that’s exploring customer preferences to tailor its future designs.
An initial survey question could be, “Which type of clothing are you most interested in?” with options like: casual wear, formal wear, athletic wear, and others.
If a respondent selects “athletic wear“, the subsequent questions could delve into specific casual wear preferences, such as specific sports, like “yoga,” “running”, or “weightlifting”.
This way, each respondent’s survey pathway is personalized, and the insights gathered are more precise and valuable.

As survey branching enables the series of questions to be modified based on the customer journey, it offers more flexibility and customization. As a result, survey branching can:
If you’re looking to take advantage of personalized surveys that speak to your customers, then branching is the way to go.
Here are several steps to help you survey with high feedback success.
Consider the goal of the survey and work backward from there. This will help you branch out different options, different approaches, and different questions.
For example, if we were to take the same scenario as the clothing line before. The goal would be to “find the best line of clothing to pursue”. That means you’d need to ask your client’s about their preferences in clothing categories, pain points, and needs.
Fruity Tip: Use Mural’s free template to help put your ideas and questions in a logical order. This will make the survey ideation and creation process easier and more organized.
After you’ve thought about the goal and the opportunities, you’ll need to design the structure of your survey.
This also means creating different branches for each question. You should also write out the questions in advance so that they flow logically from one to another.
Fruity Tip: Make sure your copy follows your brand’s writing style and guidelines. The goal is to keep users familiar with and build trust with your brand’s tone.
Next, you’ll need to set up rules that determine which questions are skipped based on the respondent’s answers. This will ensure that each respondent only sees relevant questions.
Rules usually come in the format of “if” “then”, “and”, and “or’ statements.
For example, using the survey case above, you could set the following rules:
“If users reply with athletic wear, then offer categories, yoga, running, weightlifting.” That way, only users that reply with athletic wear are given the options on specific sports attire categories.
Test your survey to make sure it is working correctly and provide clear instructions for respondents.
Share the survey with coworkers on different teams to find any glitches or problems. You can then use the results of your testing to refine your survey to ensure maximum accuracy and efficiency.
If you want to see results, then the insights your survey provides need to lead to action and product improvement. It’s not enough to know what your users want, it’s about how to make their desires a reality.
Product Fruits gives you the tools to create customized surveys with branching logistics. And, it also acts as an invisible user onboarding layer to provide your users with all the help, support, and guidance they need, to have a better experience.
That means that if survey respondents are familiar with a product, they’re only shown new features and how to use them to show the value of a product. Or, if the user is new to an app, they get the full onboarding support they need to reach their “aha” moment.
And for that, you need an onboarding platform that offers surveys, tours, hints, tooltips, and demos that guide your user to a better product experience. That way, surveys can work simultaneously with your onboarding experience to provide a comprehensive and customized user journey.
Talk to our user onboarding specialists today, and learn how to improve your user experience and loyalty.