Most new users don’t quit because your product is weak. They quit because they never reach value fast enough. “One-size-fits-all” onboarding throws the same tips and emails at everyone and hopes something sticks. Personalized onboarding does the opposite: it gives each user the next right step based on who they are (role, plan, region), what they’ve already done (events), and what they’re trying to achieve (intent).
It’s also important to start looking at onboarding through a user journey lens as it keeps you focused on sequence and timing, not just a bag of tactics. An admin on a Pro plan needs a setup checklist and an SSO guide on day one, versus an end-user needs a 90-second quickstart and a nudge to complete their first task. Same product, different paths. When you line up the right tools along that journey- inside and outside the app – you remove friction, shorten time-to-value (usually so called aha moment), and convert more trials into long-term customers without burning your team.
Watch our video to learn more about finding and leveraging your “Aha moment”.
Delivering the right next step to the right user at the right moment and channel, based on who they are, what they’ve done, and what they’re trying to achieve requires: (1) reliable user & account data, (2) targeting/experimentation, and (3) activation channels in and out of the product, with (4) feedback loops to learn and adapt. You will also need some specialized tools for in-app guidance, lifecycle messaging, contextual help, feedback, learning, and data activation.
The good news is you don’t need to buy everything at once. Start with basics like in-app guidance and lifecycle messaging, then layer sophistication. That is how we have organized this personalized onboarding tools guide – along the user journey and in a way you can build up gradually. So lets start with basics.
This is a “homework” you need to do before you start buidling any tours or sending emails – actually, even before you start looking for a product tour software or lifecycle messaging tool. You need to be clear on two things: who your users are and what “value” means for them. Personalization only works when it’s built on these basics. Expect to spend few days to a week or two on this.
Start with simple identities you can use everywhere (product, email, support)
Next, define value.
Choose one clear “Aha moment” that shows a new user has gotten real benefit (e.g., connected data, invited a teammate, shipped a first task) – this may differ based on role or plan. Then map the 2–3 steps that usually lead to that Aha. Track only the few events you’ll actually use – roughly 8–12 with plain names.
Baseline two simple KPIs: Aha Rate (i.e. how many reach Aha in 7 days) and Time-to-Aha (how long it takes). If you can, also watch what % of users have role/plan/locale captured.
Keep it lean. Avoid too many roles, personas or vague definitions. With “who” and “value” nailed, every later tactic – checklists, emails, help content, even AI – becomes targeted, measurable, and easier to manage.
Turn your Phase 0 basics into small, helpful nudges inside the product. Keep it simple: help each role reach value faster with the least number of steps.
Start with three elements: a short, role-aware checklist (3–5 items), one guided walkthrough of the core path, and smart empty states that show what to do next. Target them with basic rules (role, plan, hasn’t done X yet). Add frequency caps and “don’t show again” once a step is completed to avoid noise.
Do this now:
Measure the basics: checklist completion rate, drop-off in the walkthrough, change in Aha Rate vs. baseline, and any reduction in “I’m stuck” support tickets. If these move in the right direction, you’re on track.
Product Fruits is lightweight (midmarket-focused) yet powerful user onboarding platform for in-app guidance with checklists, tours, hotspots, and an in-app help/resource center you can target by simple rules.

Strengths:
Areas to improve/consider:
Pricing:
Enterprise-grade DAP focused on step-by-step, on-screen guidance to reduce training and support friction.
Strengths:
Areas to improve/consider:
Pricing:
In-app guides (walkthroughs, tooltips, embedded help) with guide metrics and quick no-code deploy.
Strengths:
Areas to improve/consider:
Pricing:
How to choose tips: For Phase 1, pick the tool your team can ship with fastest using your current events/segments. You can add orchestration or CDP-level targeting later without redoing the basics.
This phase brings users back when they stall (stop using your app). This means you have to reach them with short, behavior-based messages outside the product -mainly email (plus in-app inbox or push for mobile). Each message should point to one next best step with a deep link.
Keep it light: 3–5 messages tied to missed milestones. Branch by role and plan (admins get setup nudges, end-users get first-task tips, trials get upgrade prompts). Write 60–120 words, one clear CTA.
What to send
– Welcome + quick win (Day 0–1): one action, deep link.
– Missed milestone (Day 3–5): “You’re one step from value – finish in 2 clicks.”
– Value reinforcement (Day 5–7): a tiny proof or GIF relevant to their role.
– Help offer (Day 7–10): 90-sec video or human assist. For trials, a timed conversion prompt.
Target from events (“no data connected in 72h”), add failover (no email open → small in-app banner next session), and respect consent, locale, and work hours. Cap frequency (e.g., max one/day, two to three/week) and suppress once the user completes the action.
Measure simple outcomes: return visits from messages, milestone completion after a nudge, trial→paid conversion, and unsubscribe/complaint rate.
• Quick setup checklist
– Map 3–5 messages to your key missed milestones per role/plan.
– Wire triggers from tracked events and set frequency caps/suppressions.
– Draft short copy with one CTA and a deep link.
– Launch with one A/B test, review weekly and prune anything noisy.
Marketing automation with robust behavior triggers and conditional content for tailored emails.
Strengths
Areas to consider
Pricing:
Event-driven “Journeys” across email, push, SMS, and in-app with fine-grained triggers.
Strengths
Areas to consider
Pricing:
Familiar, accessible automation with “Customer Journeys” and behavioral targeting.
Strengths
Areas to consider
Pricing:
How to choose tips for phase 2: pick the tool that connects cleanly to your product events today and lets you build 3–5 behavior-triggered messages. You can usually layer deeper orchestration later.
By now you’ve guided users inside the product and nudged them back when they stall. Phase 3 makes help findable at the exact moment of need – so fewer users leave to blindly search, open tickets, or give up. We put it at weeks 5-7, however if you do not have an existing help content (manuals, knowledge base or similar), you may task someone or create a small team to start working on such content right from the week 1, as building it up may take some time. Also, you may want to enable some of the in-app help features, such as help center linking to support chat and providing users with updates right from the week 1.
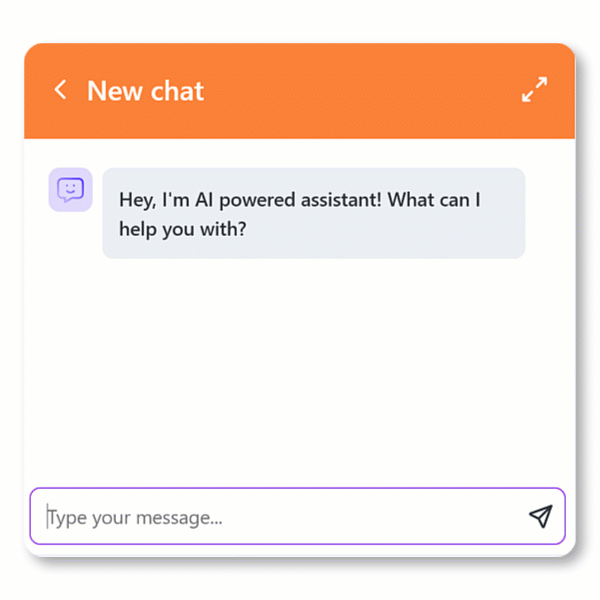
To not overwhelm yourself take “just-in-time, just-enough” approach. Modern onboarding and adoption platforms provide capable in-app help features as well as sufficient knowledge base capability, so use those. Some will even offer AI copilot that will answer user questions using this content.
What to include
* If you do not have it, you should start building a body of knowledge about your product, such as knowledge base. Make sure to review content you put in to make it up-to-date, correct and single source of truth.
Help Center content inside the Messenger with searchable articles and AI for self-serve answers.
Strengths

Areas to consider
Pricing:
Enterprise DAP with interactive walkthroughs and self help – a contextual help widget that recommends content on any screen.

Strengths
Areas to consider
Pricing:
Guides, tooltips, and a Resource Center that surfaces articles, videos, and updates, now with an in-app AI assistant.
Strengths
Areas to consider
Pricing:
Product Fruits offers great balance to cover both in-app obnoarding and help/self support: In-app tours, tooltips, checklists, plus a “Life Ring” help center with AI Copilot and AI search.
Strengths
Areas to consider
Pricing:
How to choose tips for phase 3: Prioritize an embedded help panel (some possibility of targeting is a plus), look for smart search or (even better) an AI assistant to resolve common questions in place, and possibly guide launchers so users can act immediately.
We have introduced key steps to start with personalized onboarding of your users in first three phases. However your work has just started, from now on you have ongoing duties, such as:

